
Introduction
Damage during storage and shipping is rarely “bad luck”. It usually comes from predictable forces: vibration in a lorry, compression in a stacked carton, corner impacts during handling, and abrasion when two surfaces rub. PE foam (polyethylene foam) helps because it cushions knocks, resists compression, and adds a clean surface barrier.
This step-by-step tutorial is for e-commerce packers, warehouse teams, and manufacturers who want a practical packing method using Pe Foam Malaysia supplies. You’ll learn how to choose foam thickness, how to wrap common product categories (fragile parts, electronics, furniture), and how to combine foam with cartons, void fill, and tape so your process stays consistent at scale.
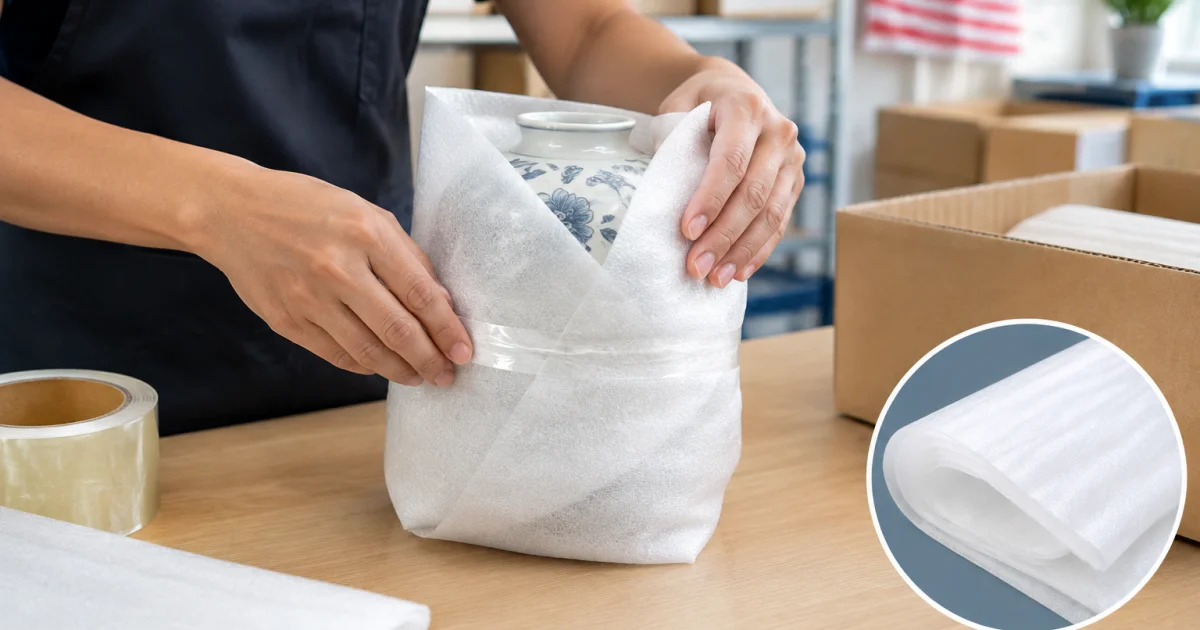
The goal is not “perfect packing at any cost”. It’s damage reduction with a workflow your team can follow daily—especially during peak periods.
What PE foam does (and what it doesn’t) in real shipping conditions
PE foam is a closed-cell protective packaging material. It’s lightweight, clean, and durable, making it a reliable layer for most packing stations.
Problems PE foam solves well
- Surface protection: helps prevent scratches and scuffs on painted, coated, anodised, or polished finishes.
- Minor shock absorption: cushions light-to-medium impacts and reduces corner denting.
- Vibration damping: reduces micro-movement that causes wear, loosening, or abrasion.
- Separation: keeps parts from contacting each other in a carton or tote.
- Clean barrier: tidy and easy to handle versus many loose-fill options.
What PE foam is not meant to replace
- Rigid structure: it won’t replace a strong carton, crate, or internal bracing.
- High-drop protection without space: if there’s no clearance to compress, cushioning can’t work.
- Moisture-proof shipping: foam is water resistant, but overall protection depends on carton grade and sealing.
In practice, PE foam performs best as part of a system: correct carton size + foam wrap + void fill/bracing + consistent tape sealing + stable pallet wrap when needed.
Step 1: Choose the right PE foam format and thickness for the job
Start by matching foam choice to the product’s fragility and shipping method. The most common formats are PE foam sheet and PE foam roll, both easy to cut and wrap.
How to decide thickness (a practical approach)
- Identify the main risk: scratches, corner impact, stacking compression, or vibration.
- Check product geometry: sharp corners, protrusions (knobs, connectors), legs/feet, delicate surfaces.
- Confirm shipping path: courier networks usually mean more handling than dedicated transport.
- Plan clearance: leave a cushioning gap between product and carton wall using foam and/or void fill.
As a practical rule: thin foam is ideal for surface protection; thicker foam (or layered builds) is for impact/corner protection. If corners keep getting damaged, improve cushioning and carton fit—don’t rely on extra tape.
Sheet vs roll: when each is easier
- Rolls: faster for wrapping (electronics, long parts, furniture panels).
- Sheets: better for lining cartons, interleaving, and top-and-bottom pads.
To reduce errors across many SKUs, keep two standard foam options at the station: one for surface protection and one for cushioning.
Step 2: Set up a repeatable packing station (tools, layout, and safety)
Good materials still fail when the station is rushed or inconsistent. Standard station layout improves speed and reduces damage.
Recommended tools and consumables
- Measuring tape or fixed ruler (repeatable cut lengths)
- Sharp safety cutter (dull blades tear foam and waste material)
- Scissors for trimming around protrusions
- Cartons in standard sizes matched to common products
- Void fill (bubble wrap, corrugated paper, air pillows, or foam pads/strips)
- Sealing tape suited to carton weight and storage conditions
- Stretch film for bundling/pallet stability where relevant
- Labels/markers for handling notes (where your process allows)
For higher volume, a simple “packing standard” board with photos (wrap coverage, corner build-up, sealing pattern) helps keep results consistent across shifts.
Safety and product cleanliness
- Cut away from the body; store blades properly and replace them before they go dull.
- For clean packing areas, use appropriate PPE (such as gloves) to protect products and staff.
- Wear site-appropriate footwear in packing/dispatch areas; in some industrial environments, rubber boots or safety footwear may be required.
Step 3: The core PE foam wrapping method (works for most items)
This is the foundation method to train quickly. Once it’s consistent, add reinforcements (corner blocks, double layers, rigid inserts) only where needed.
3.1 Measure and plan the wrap coverage
- Measure the longest wrap path around the product.
- Add overlap allowance so foam can overlap without gaps.
- Plan for corners/edges: they usually take first impact in drops.
Common mistake: protecting flat faces but leaving corners thin. Corners are the usual failure point.
3.2 Wrap with tension control (not too tight)
- Start near the foam edge to reduce offcuts.
- Wrap with light tension so foam stays flat without bunching.
- Add a second layer on edges/corners for heavy or fragile items.
Over-tight wrapping compresses foam and reduces cushioning, especially at corners.
3.3 Secure the foam without damaging the product
Use tape to hold foam to itself, not to the product surface where possible.
- Preferred: tape-to-foam overlap so adhesive never touches the product.
- If unavoidable: test tape on a small area first to prevent residue or finish lifting.
Consistent tape quality also matters. Some operations prefer a dependable Adhesive Tape Manufacturer Malaysia supply chain to avoid sealing failures caused by inconsistent adhesion.
Step 4: Packing fragile industrial parts (machined parts, glassy surfaces, sharp edges)
Industrial parts can be “fragile” due to brittle materials, precision surfaces, sharp edges that cut packaging, or high cosmetic/value requirements. Your method should prevent rubbing, protect edges, and stop movement.
4.1 Method A: Individual wrap + separation (best for multi-part cartons)
- Clean the part to remove grit that can scratch during vibration.
- Wrap each part with full foam coverage.
- Reinforce edges with double layers where sharp or impact-prone.
- Separate parts using foam sheets between layers.
- Stabilise in the carton with corrugated paper or foam pads so nothing shifts during a gentle shake.
Example: For anodised aluminium components, wrap each item and add a foam sheet “interleaf” between parts to prevent grey rub scuffs after transport.
4.2 Method B: Tray-lining for heavy parts (reduce abrasion + improve handling)
- Line the bottom of the tote/carton with a foam sheet.
- Place parts with small gaps.
- Use foam strips as dividers.
- Add a top foam sheet before closing.
This approach is fast for picking and reduces damage from parts sliding into each other.
4.3 Don’t let sharp edges defeat your packaging
Sharp edges can cut foam and cartons. Use thicker foam at contact points and/or add a tougher layer (for example, folded corrugated pads) under the foam at edges to prevent slicing through.
Step 5: Packing electronics (devices, PCB assemblies, and retail-ready products)
Electronics packaging must protect both cosmetics and function. The main enemy is movement inside the box, which creates impact, abrasion, and connector damage.
5.1 Key risks to control
- Corner drops in parcel networks
- Scratching on screens and finished surfaces
- Protrusion damage (ports, switches, antennas)
- Internal movement that lets the item gain momentum
5.2 Method: Wrap + buffer zone + immobilise
- Wrap: full foam coverage, with extra attention to corners.
- Reinforce protrusions: add a small foam block/ring so sensitive areas don’t take direct pressure.
- Create a buffer zone: choose a carton that leaves room for cushioning around the wrapped item.
- Immobilise: fill side gaps with foam strips or other void fill so the item cannot shift.
- Top pad: add a foam sheet before sealing.
Example: For a handheld device, wrap it with foam, then add two foam strips along the long sides of the carton to act as rails and reduce side-impact transfer.
5.3 Tape and sealing discipline matters for electronics
- Use the H-taping method (center seam plus both edge seams) on heavier cartons.
- Match tape to conditions (humidity, dust, temperature) and carton weight.
- Avoid tape-only repairs: replace crushed or torn cartons.
For operations that pack daily, standardising tape type and training reduces variation. Reliable adhesive tape options can help keep sealing consistent across shifts.
Step 6: Packing furniture and large items (panels, legs, corners, and bundles)
Furniture damage is often cosmetic (scratches, rub marks, corner dents) but still triggers costly returns. Many pieces are long or awkward, and multi-part bundles tend to shift unless they are braced properly.
6.1 Method for flat panels (table tops, cabinet sides, doors)
- Surface wrap: cover both faces with foam sheets or wrap with foam roll.
- Edge focus: add an extra strip along all edges.
- Corner build-up: double-layer corners or add corner protectors under foam.
- Bundle carefully: insert foam sheets between multiple panels.
- Outer layer: add corrugated paper outside the foam if handling is rough (puncture resistance).
Example: For two cabinet doors, wrap each door separately, add a foam sheet between them, then add a corrugated outer wrap before placing into a long carton to reduce rub marks from vibration.
6.2 Method for legs, frames, and protruding parts
- Wrap each component with foam.
- Add extra padding at joints and connection points (common chipping areas).
- Use foam strips as spacers to prevent hard contact between parts.
If bundles still shift, the issue is usually immobilisation inside the carton or pallet stability—not the foam itself.
6.3 Stabilise larger cartons and bundles for transport
- Bundle cartons with stretch film when shipping sets so boxes don’t separate.
- Palletise when possible to reduce repeated handling impacts.
- Use edge protection before wrapping/strapping to reduce pressure dents.
Many warehouses pair internal foam protection with stable pallet wrapping using Stretch Film Malaysia supply for load security and reduced transit damage.
Step 7: Build the “complete pack” system: carton sizing, void fill, and sealing
Foam wrapping alone won’t fix damage if carton fit is wrong or the product can move. Build a complete pack system so forces are managed predictably.
7.1 Carton sizing: avoid two extremes
- Too small: foam compresses flat and loses cushioning; corners can press into the wall.
- Too big: the item accelerates inside the box and hits walls harder.
A practical target is “snug with cushioning”: enough room for foam and bracing, but not enough empty space for momentum.
7.2 Void fill: choose based on movement, not habit
Void fill should stop movement and distribute forces. Common options:
- Corrugated paper: good for blocking/bracing and heavier items.
- Bubble wrap: useful for light cushioning and moderate voids, but can pop under heavy compression.
- PE foam strips/pads: clean and consistent for repeatable industrial packing.
If you hear movement during a gentle shake of the sealed carton, treat it as a fail and add bracing.
7.3 Sealing: use a standard method your team can audit
- Standardise tape by carton weight band (light/medium/heavy).
- Standardise sealing pattern (H-pattern is easy to train and audit).
- Standardise inspection: no gaps on seams, no lifting corners, no dust on tape zones.
For broader context on why consistency matters, see how packaging quality affects product protection during transportation.
Step 8: Quality checks and simple tests to reduce damage complaints
Fast improvements come from combining a standard method with quick checks. You don’t need a lab—just a repeatable audit routine.
8.1 Packing checklist (quick, practical)
- Coverage: faces, corners, and edges protected?
- Immobilisation: any movement inside the carton?
- Buffer zone: cushioning space between item and carton wall?
- Compression readiness: carton strong enough for stacking?
- Sealing: seams fully taped with no lifting?
8.2 Simple tests you can run on a sample pack
- Shake test: gentle shake; movement means add bracing/void fill.
- Corner set-down test: set down firmly on corners/edges (not a drop) and check internal shifting.
- Stack test: place weight on top briefly to simulate stacking; check bowing and tape lifting.
If a pack fails, adjust one variable at a time (carton size, corner build-up, immobilisation, carton grade). This prevents overpacking while targeting the real cause.
8.3 Standardise materials to standardise results
Damage complaints often spike when materials are substituted (foam thickness, tape, carton grade). Standardise key consumables and keep them in stock. If you source multiple protective materials, a one-stop supplier can also reduce packing downtime.
Conclusion: turn PE foam into a repeatable damage-reduction process
PE foam works best when used with intent: protect surfaces, reinforce corners, create a buffer zone, and immobilise the product inside a correctly sized carton. Whether you ship precision parts, sensitive electronics, or furniture panels, consistent results come from a repeatable method that balances protection and packing speed.
To keep improving, review damage cases and identify the dominant failure mode—movement, corner impact, compression, or abrasion—then adjust foam placement and carton fit accordingly. Small, disciplined changes often reduce rework, returns, and customer dissatisfaction more than complicated materials do.
For foam and complementary packaging supplies, explore AM Packaging’s wrap and foam category to support a consistent packing station setup.
Frequently Asked Questions
Is PE foam better than bubble wrap for protecting products?
They solve slightly different problems. PE foam is excellent for preventing scratches, adding clean surface protection, and providing consistent cushioning—especially for flat panels and items that must look cosmetically perfect. Bubble wrap is useful for filling voids and providing light cushioning, but it can pop under compression and may leave pressure marks on delicate finishes if over-tightened. Many packers use both: PE foam as the first wrap layer, then bubble wrap or paper to immobilise inside the carton.
How do I know how much PE foam to use so I don’t overpack?
Start with a standard wrap (full coverage plus overlap), then add protection only where risk is highest: corners, edges, and protrusions. After boxing, do a gentle shake test—if the item moves, add bracing/void fill rather than simply adding more foam layers everywhere. Overpacking is usually caused by using an oversized carton or skipping immobilisation, not by using “too little foam”.
What’s the best way to protect corners and edges with PE foam?
Corners and edges should get extra build-up because they are the first contact points in drops and knocks. Use double-layer foam strips along edges, and add an extra wrap layer at each corner. For heavier items, place a stiffer layer (like a folded corrugated pad) under the foam at sharp edges to prevent the edge from cutting through the foam and carton during handling.
Should tape touch the product when securing PE foam?
Ideally no. The safest method is to tape foam-to-foam so adhesive never contacts the product surface. If you must tape near a surface (for example, to stop the foam unwrapping on an awkward shape), test the tape first to ensure it doesn’t leave residue or lift paint/lamination. Consistent packing tape quality also matters because weak adhesion can cause the wrap to loosen and allow movement in the carton.
Do you supply PPE like non-woven isolation gowns in Malaysia for packing or industrial use?
Many industrial operations use PPE to keep packing areas cleaner and protect staff. AM Packaging supplies a range of PPE and safety products (such as masks, gloves, aprons, sleeve covers, shoe covers, isolation gowns, and lab coats) depending on operational needs. If you have a specific requirement such as a non-woven isolation gown, share the intended use and quantity so the right specification can be confirmed.
Need a consistent PE foam packing setup for your warehouse?
AM Packaging supports manufacturers, warehouses, and e-commerce teams with PE foam, bubble wrap, corrugated paper, stretch film, strapping, and carton sealing tape—so you can standardise your packing method and reduce damage during storage and transportation.
If you’re building a repeatable packing SOP, tell us what you ship (fragile parts, electronics, or furniture), your carton sizes, and your daily volume. We’ll help you select practical materials and quantities that fit your operation.
Disclaimer Statement
We hope you found this article informative. Our content is intended for general informational purposes only and does not constitute advice or necessarily reflect the full range of services offered by AM PACKAGING SDN BHD
Readers are advised to consult with a qualified industry professional and contact our experts for recommendations specific to their individual project needs. While we strive for accuracy and completeness in our blog posts, we cannot guarantee they are error-free. AM PACKAGING SDN BHD assumes no responsibility for any errors or omissions.